This document shows steps to configure cloud hosting for server-side web services. We will use Render .
Preliminaries
You must have these installed already:
-
Node.js, a server-side JavaScript network application framework. -
Git, a version control system. -
PostgreSQL, a database server.
Initial project setup
-
Open the command-line (Git Bash or Terminal).
-
Let’s create a new project
express --no-view Node6-Render
-
Go into the project folder you created. After this step, assume you are in this folder.
cd Node6-Render
-
From the command line, install dependencies listed in
package.json. This command may take a while to run.npm install
Database setup
-
Install Node.js bindings to PostgreSQL .
npm install pg --save
-
We will need to define DATABASE_URL into
.envto access the database.# Windows users only (replace password with the database password you created during installation) echo "DATABASE_URL='postgres://postgres:password@localhost/postgres'" > .env # Mac users echo "DATABASE_URL='postgres://localhost'" > .env
-
To read the
.envfile intoprocess.env, installdotenv:npm install dotenv --save
In-class exercises
Copy&Paste necessary files to Node6-Render
-
Forms (Node3-Forms)
madlibs.html,madlibs.js -
Database (Node4-Postgres)
cars.html,cars.js,cars.txtYou will need to recreate tables and insert data to Render remote database server.
-
Authenticate (Node5-Authentication)
app.js,users.js,index.html,login.html,profile.html,signup.html,login.js,signup.js,showPassword.js,login.css,style.cssInstall necessary packages:
express-session,bcryptjs,passport,passport-local,express-flash -
Update
index.jsproperly. Note that you will need to add formadlibsandcarsexercises
npm start
-
Go to http://localhost:3000/
-
Test all your exercises If not working, do not move on until you fix it.
Setup PRIVATE github Repository
Refer to Assignment0 instruction, if you don’t remember how to.
-
Create a repository for this project from github page. It must be PRIVATE repository since we will use this for the assignment and exam.
Name the repository properly since this name will be used for Cloud hosting server name later. I recommend using your LASTNAME or unique_name.
-
You MUST be INSIDE /Node6-Render Directory. Run the following
gitcommand.git init echo "node_modules" >> .gitignore echo .env >> .gitignore echo package-lock.json >> .gitignore echo .DS_Store >> .gitignore #only for Mac users git status git add . git commit -m "Initial commit"
Note that you MUST copy and paste your own SSH link. If you don’t know where to find it, refert to
assignment0or ask!git remote add render git@github.com:yourGithubID/RepositoryName.git git push render main # it could be: git push render master
-
Check your github repository to see if everything is pushed properly
Setup Render
Render is one of many modern web hosting services, and it uses git for deployment.
-
Sign up to create your free account on Render.
-
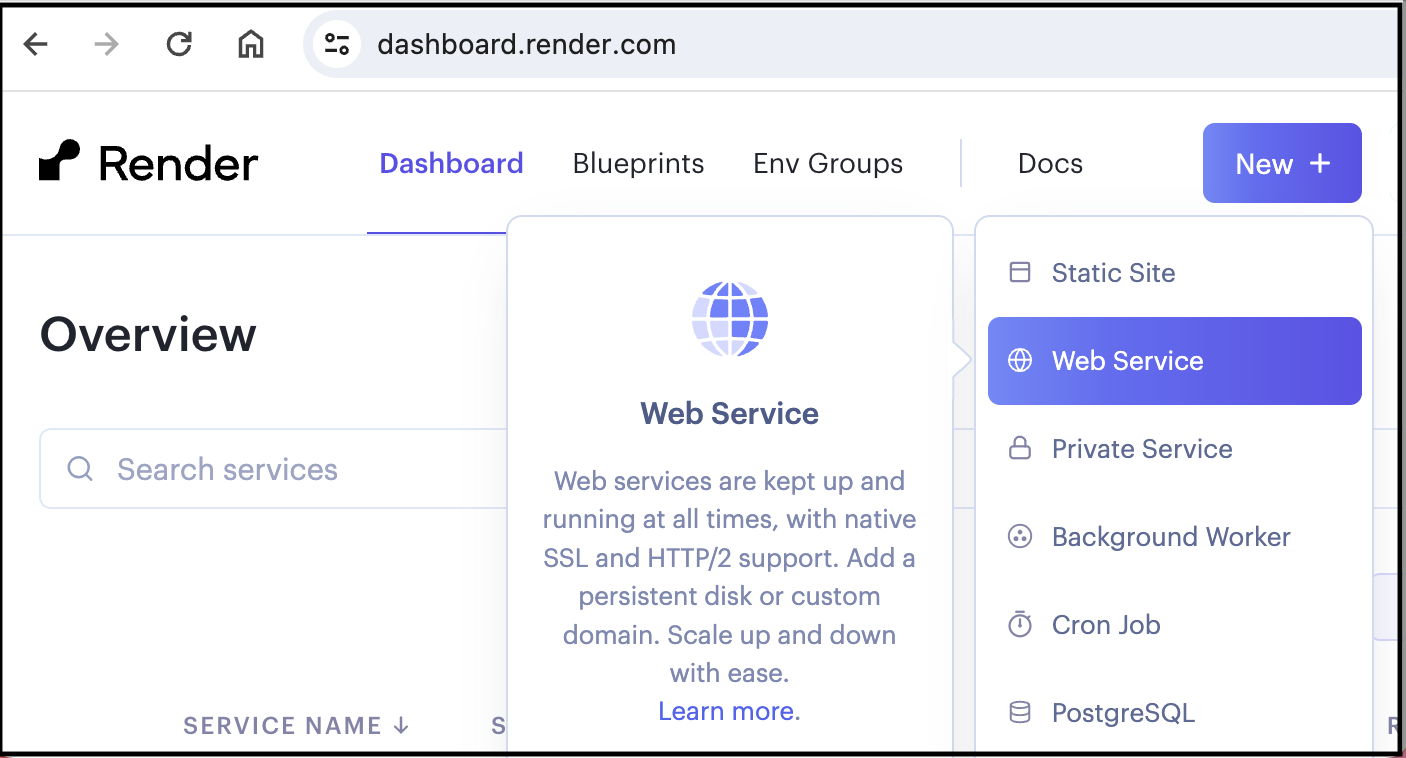
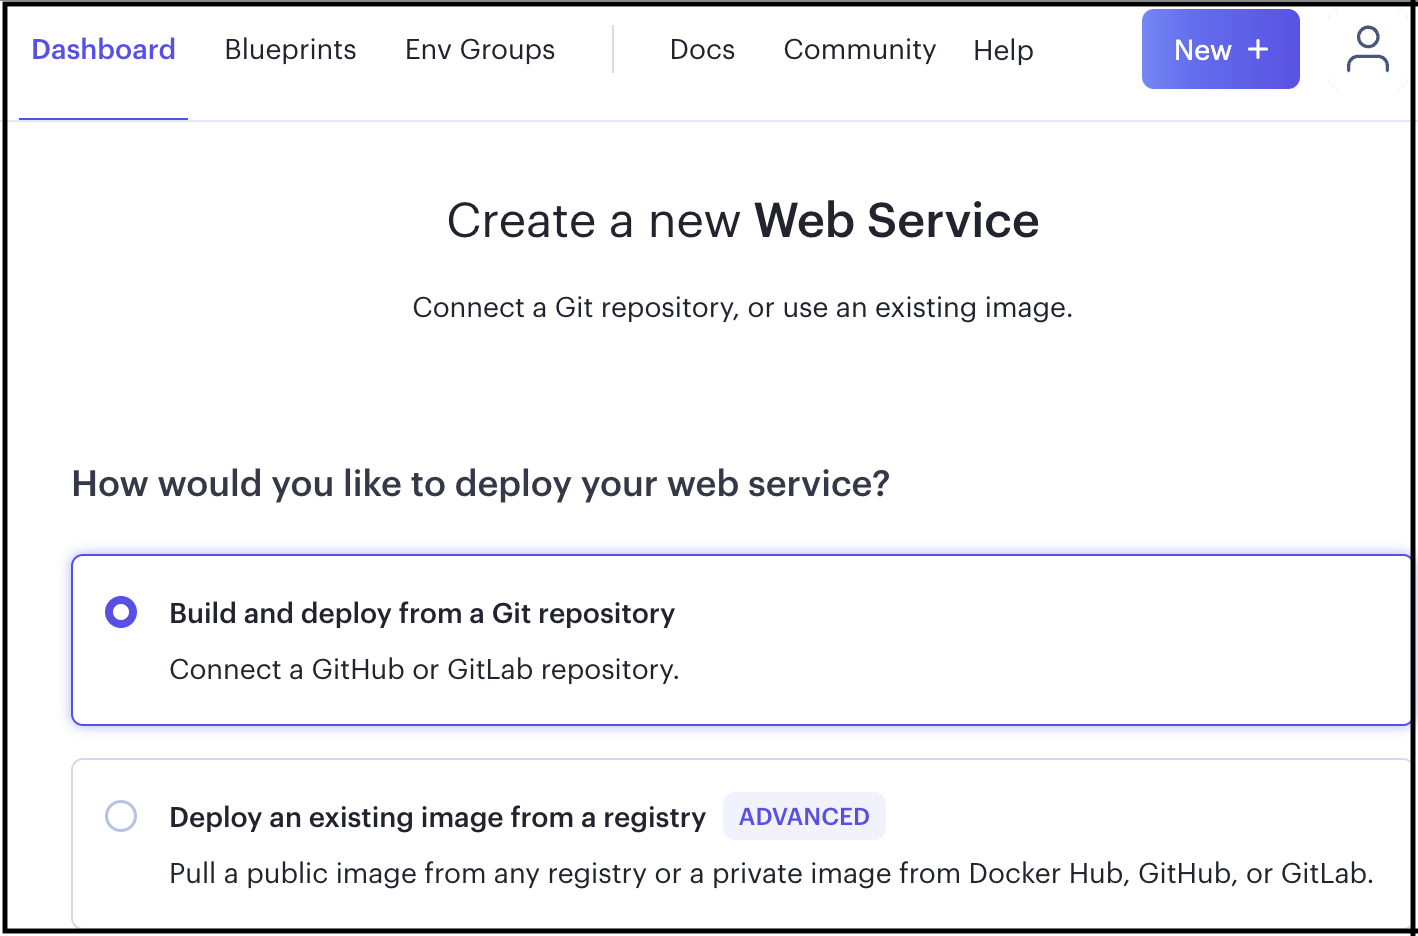
Create Web Service from Render
-
Connect to github repository from Render
-
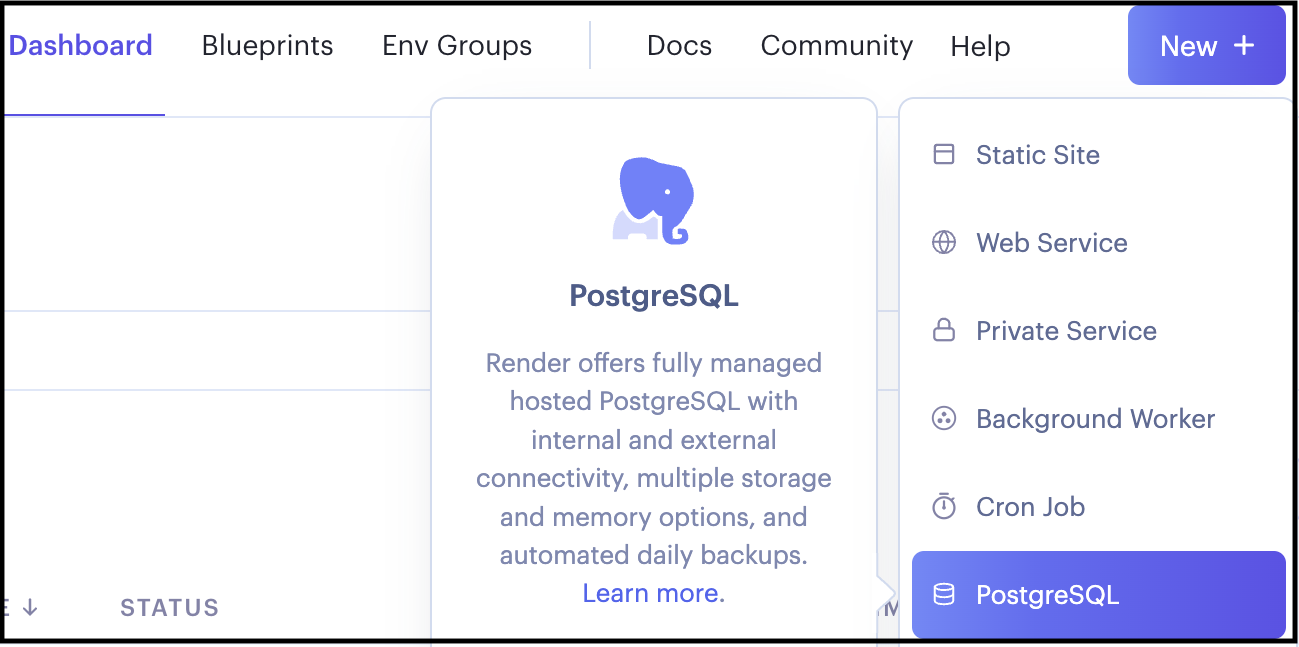
Create Postgres
-
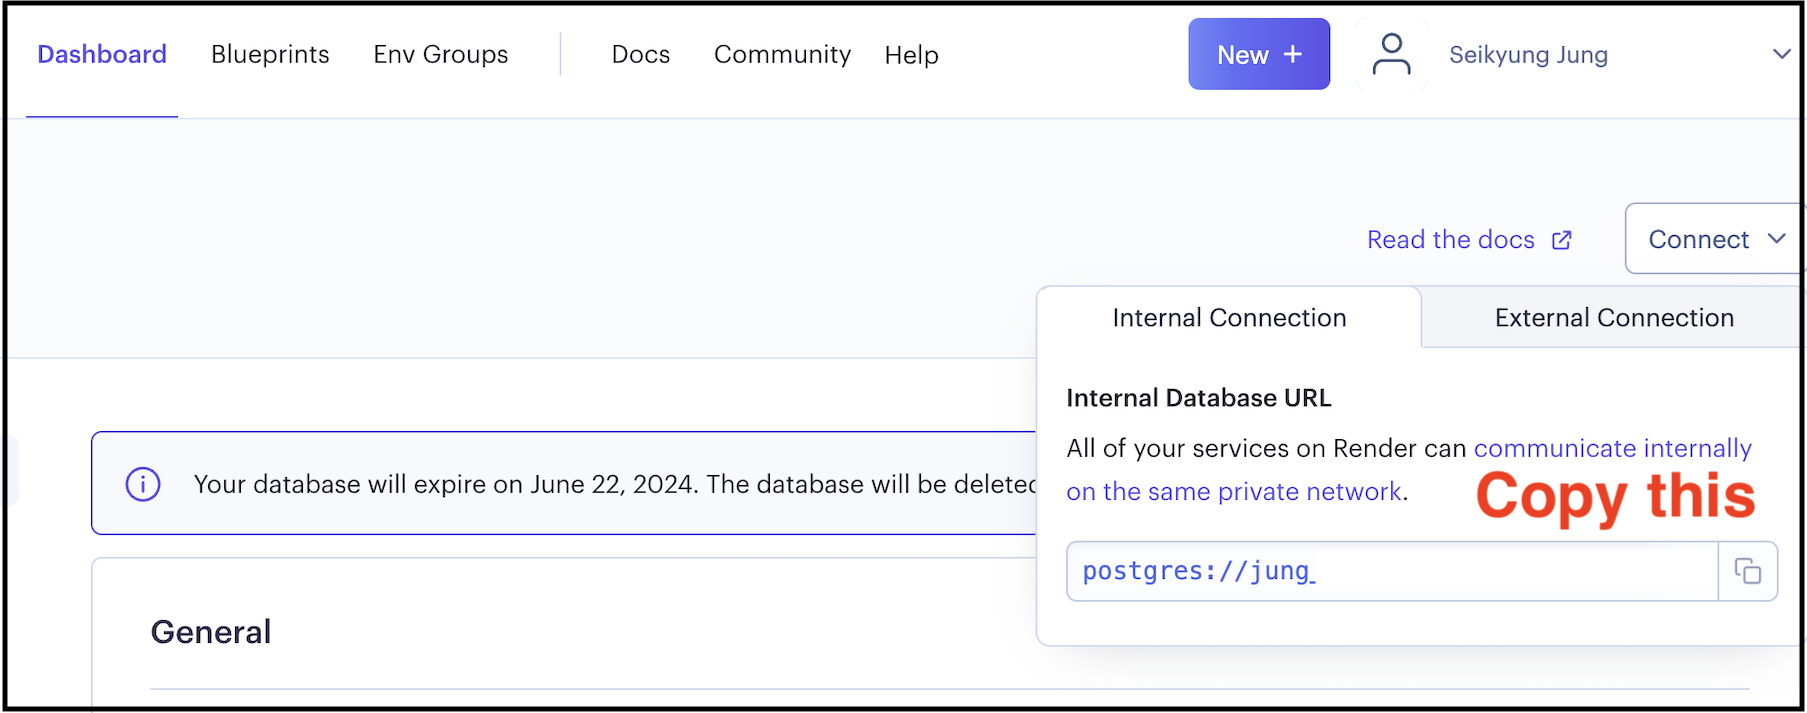
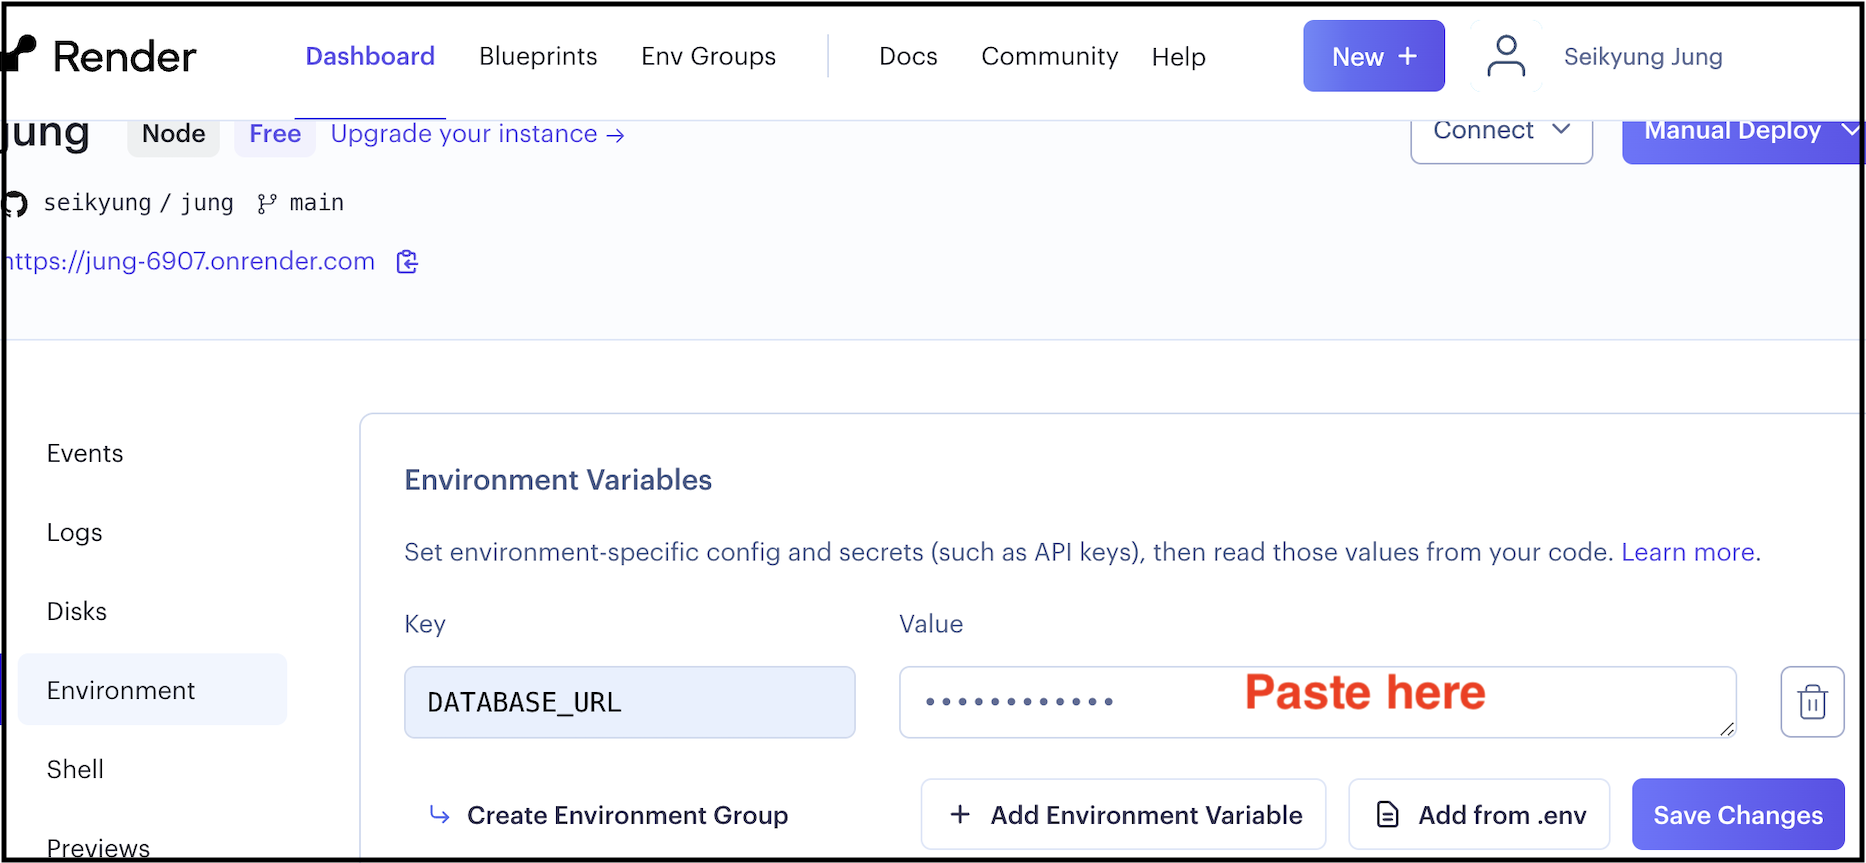
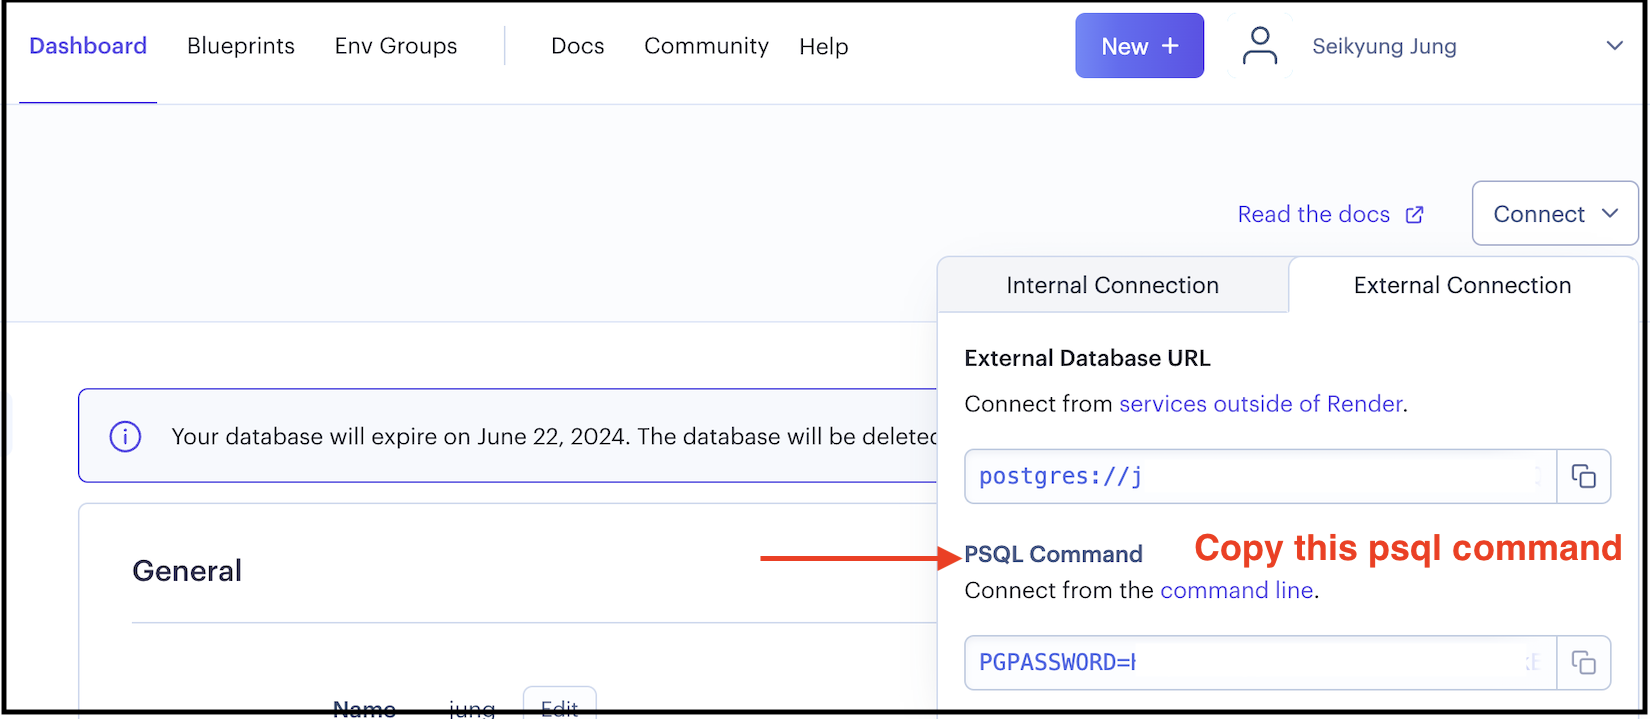
Get environment variable: DATABASE_URL
-
Set environment variable: DATABASE_URL
-
psql command to access remote database
Database on Remote Server
Last step is to replicate database on Render
You will need to recreate tables and insert data to Render remote database server. For example for the authentication,
psql command here that copied from Render site (last screen shot)
CREATE TABLE users ("id" serial primary key, username text, password text, fullname text, prefer text);

INSERT INTO users (username,password,fullname,prefer) VALUES('admin','$2a$10$tXMKF036p0ZYIxF/cJEHauw/TFrcho4DXy41Kt12D3Lbnzr221hmK','Marshall Mathers','Eminem');

create table cars (equipID serial PRIMARY KEY, maker CHAR(10), model CHAR(20), year INT );

\COPY cars FROM 'cars.txt' WITH (FORMAT csv);

\q
Note that we have two databases; one on your laptop (local) and one on Render (remote)
Assignment#4
Submit your URL to Black Board. You ONLY need to submit BASE URL
Here are the links that I am going to test (replace my URL to your URL):
-
https://jung-6907.onrender.com/
Authentication (5 points)
-
https://jung-6907.onrender.com/cars
Postgres (3 points)
-
https://jung-6907.onrender.com/madlibs
Madlibs (2 points)